I wish the paper was a little smaller, the hardest part of the whole thing is getting the paper to the right size!

Cut the paper to 12x12 (or 6x12 for the baby bug)

Place it on the mat
dull side DOWN, cut the design u would like. REMEMBER if u are doing letters & words to write them backwards & flip them. If u do not have CDS or an E, u can put the paper on shiny side down & it will have the same effect.

This is the paper after I've made my cut.

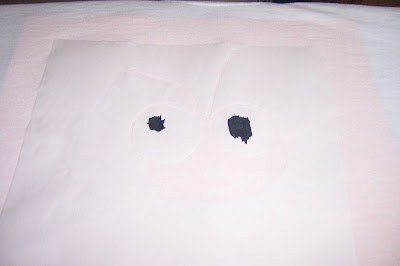
Place the paper shiny side down on the shirt or whatever u are going to paint, then rub over it with a hot iron (no water) make sure the edges are down really well. If they're not the paint will run under them. Place the paper over everything u don't want to paint: for example I added paper over the eyes & the mouth, so they stayed white. Before u start painting u will want to put some paper inside of the shirt, so the paint doesn't leak through. Make sure u don't put the paint on too thick, but u also want to make sure that u have no "white" (or whatever color the shirt is) left either.

Here I painted the black for the eyes.

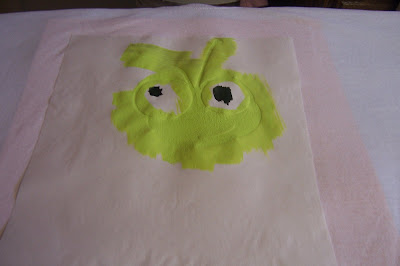
Then comes the green, just had to be careful not to get any on the black. It looks kinda funny when the paint is wet, so don't worry until after u pull off the paper LOL

Here it is, the finshed product, when peeling the paper off be careful especailly if the paint is still a little tacky.
 Cut the paper to 12x12 (or 6x12 for the baby bug)
 Place it on the mat dull side DOWN, cut the design u would like. REMEMBER if u are doing letters & words to write them backwards & flip them. If u do not have CDS or an E, u can put the paper on shiny side down & it will have the same effect.
 This is the paper after I've made my cut.
 Place the paper shiny side down on the shirt or whatever u are going to paint, then rub over it with a hot iron (no water) make sure the edges are down really well. If they're not the paint will run under them. Place the paper over everything u don't want to paint: for example I added paper over the eyes & the mouth, so they stayed white. Before u start painting u will want to put some paper inside of the shirt, so the paint doesn't leak through. Make sure u don't put the paint on too thick, but u also want to make sure that u have no "white" (or whatever color the shirt is) left either.


So awesome...I love that cricut cut....which cart is it from or is it a file? Would love to make a shirt like this for me:0)
ReplyDeleteTFS...Sheri G